

(Podcast Episode)
Construct A Solar-Powered Water Feature For Your Garden
A Step-by-Step Guide
Do you think about how to construct a solar-powered water feature for your garden: A Step-by-Step Guide? If so, you’ve landed in the correct spot. Solar-powered garden features are becoming increasingly popular as people seek environmentally friendly ways to improve their outdoor living spaces.
Solar energy is a sustainable source of energy that may be used to power various outdoor equipment, including water features. As a result, solar energy can reduce your environmental impact and save you money on your electricity bill. Plus, solar-powered water features are easy to install and require little maintenance.
The blog will guide you through constructing a solar-powered water feature for your garden, from choosing the right container and rock to installing the pump and solar panel.

Types of Solar-Powered Water Features
Solar-powered water features are a great addition to any garden, providing a soothing, eco-friendly ambiance. There are various types of solar-powered water features available on the market. Still, we will focus on the three most popular ones: the bubbling garden fountain, the disappearing water fountain, and the solar-powered pond fountain.
Bubbling Garden Fountain
A bubbling garden fountain is a small fountain that uses a pump to circulate water from the base to the top of the fountain, creating a relaxing bubbling sound. It is an elegant water fountain feature that can be easily constructed using a flower pot, a water pump, and a solar panel.
Disappearing Water Fountain
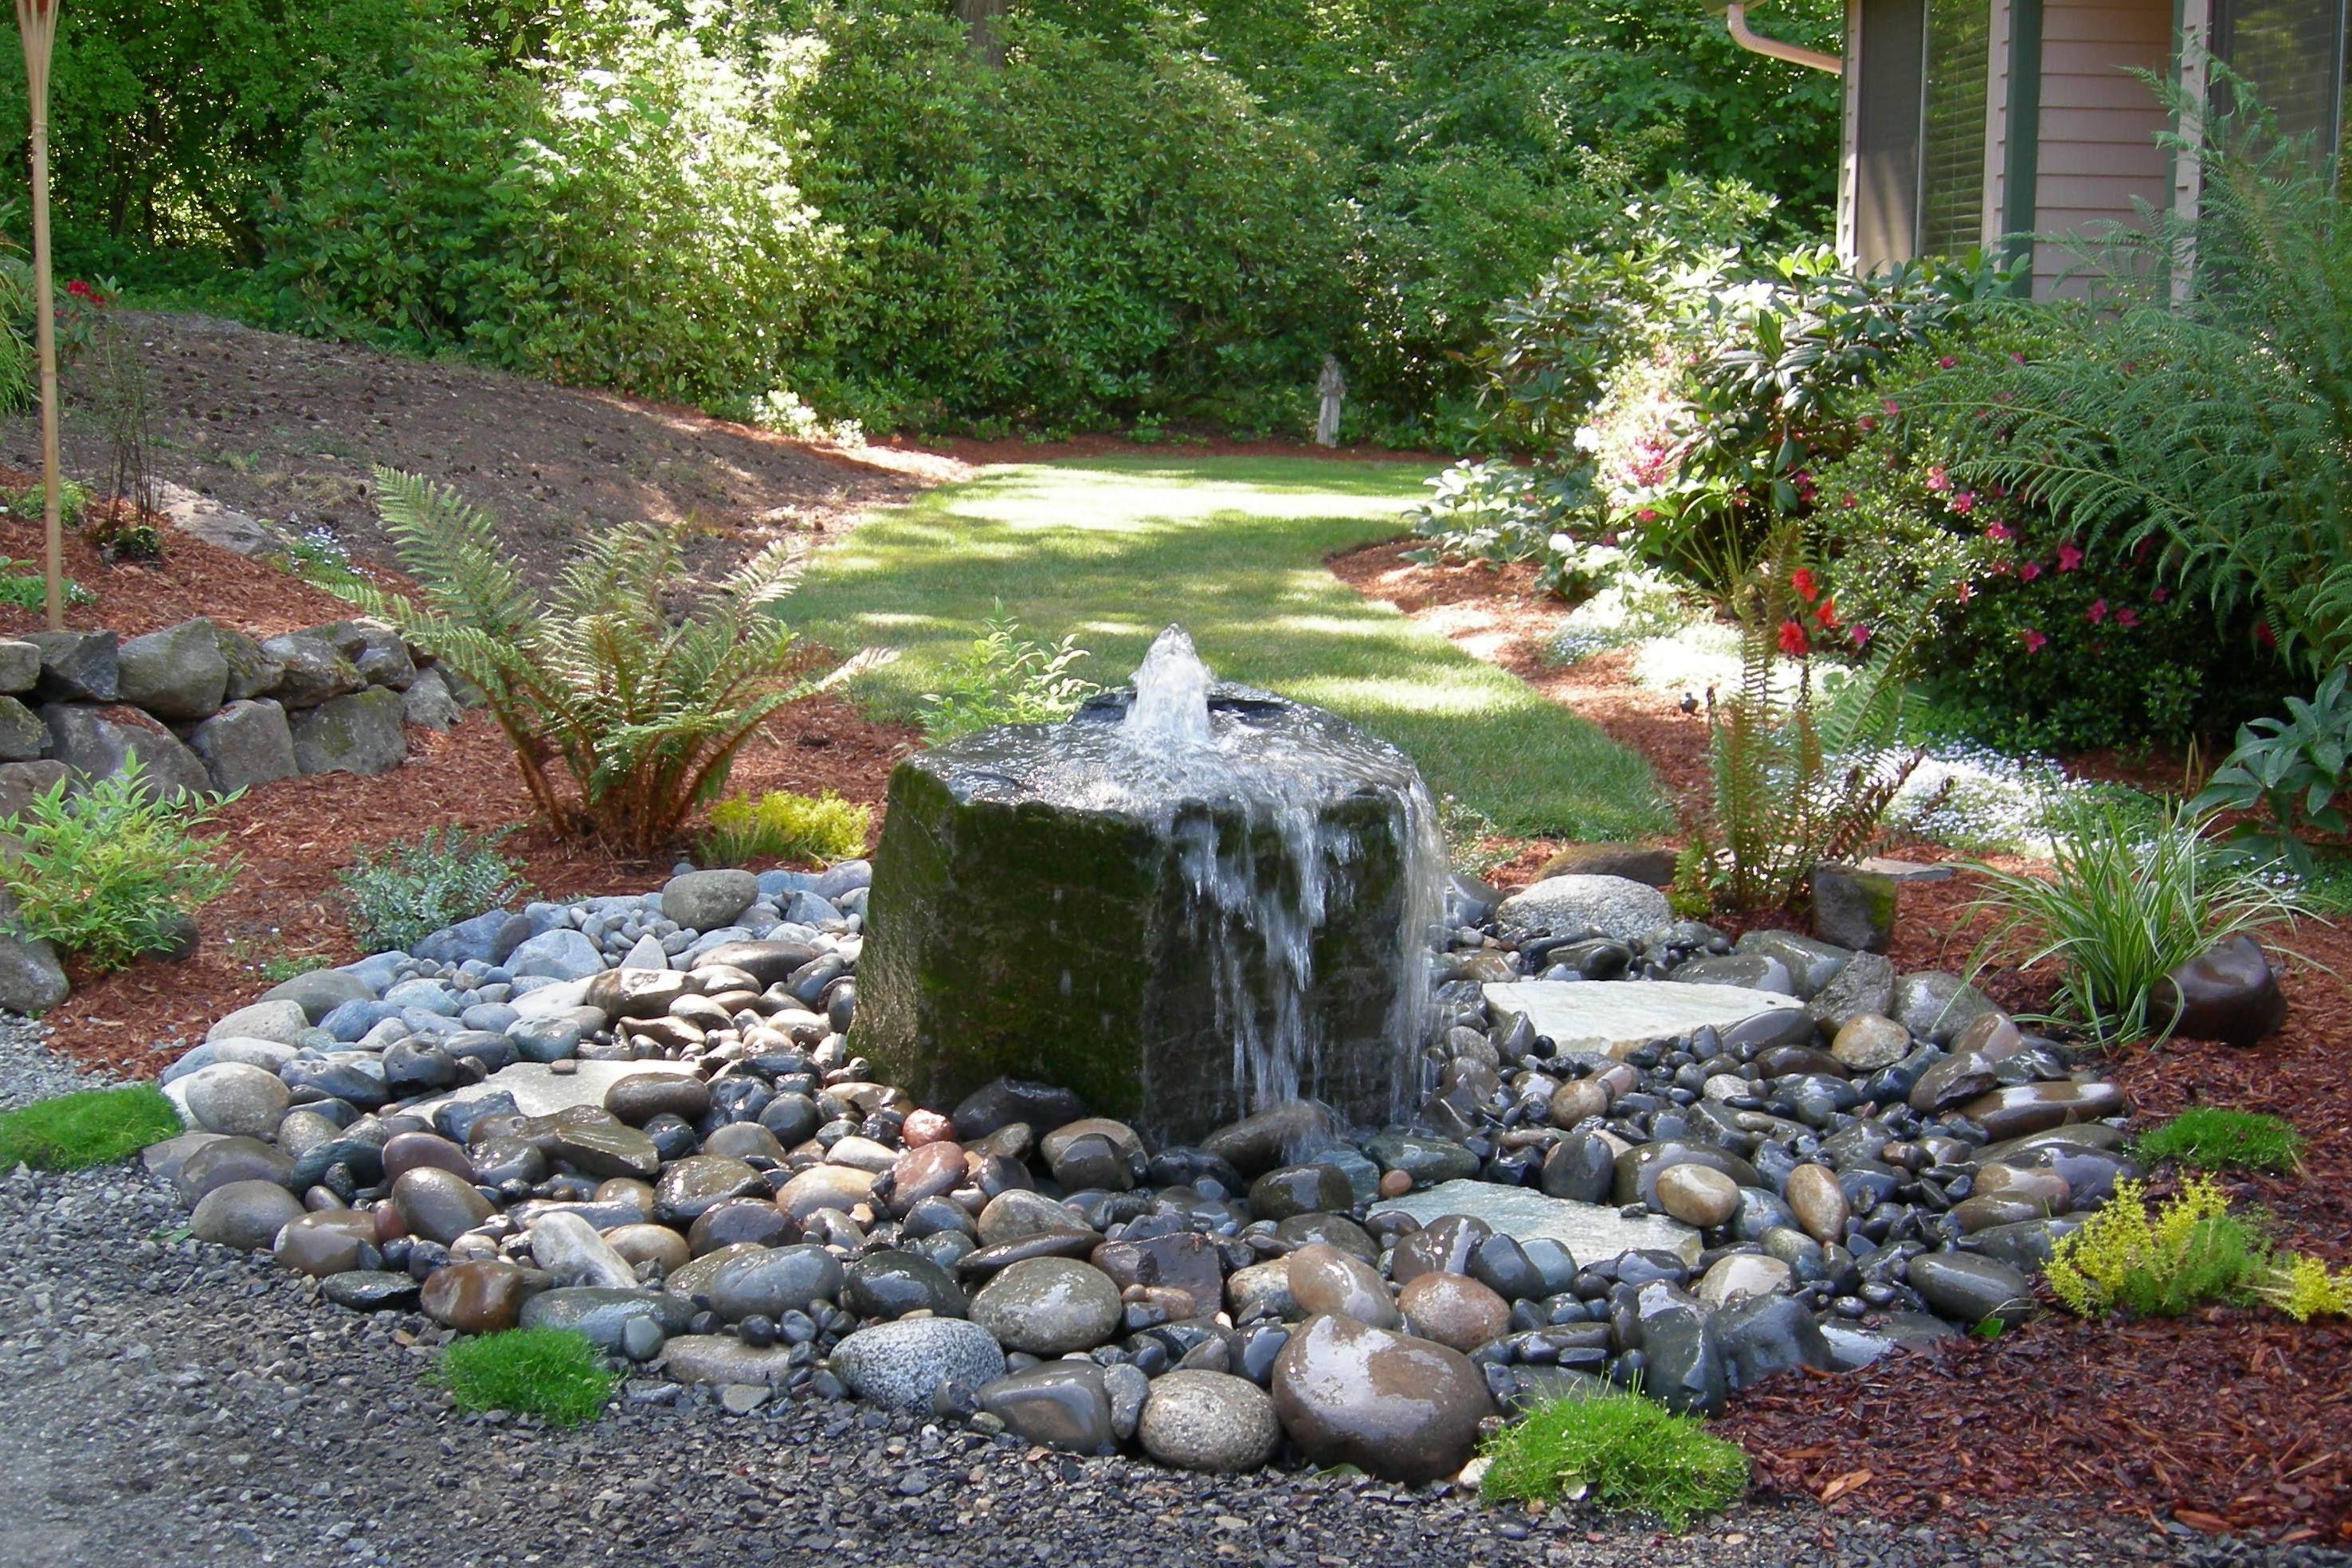
A disappearing water fountain, also known as a hidden fountain, is a unique water feature that creates the illusion of a floating rock. The fountain uses a submersible pump to pump water through a hidden reservoir and out of the top of the rock, making it appear as if the water is magically flowing from the rock.
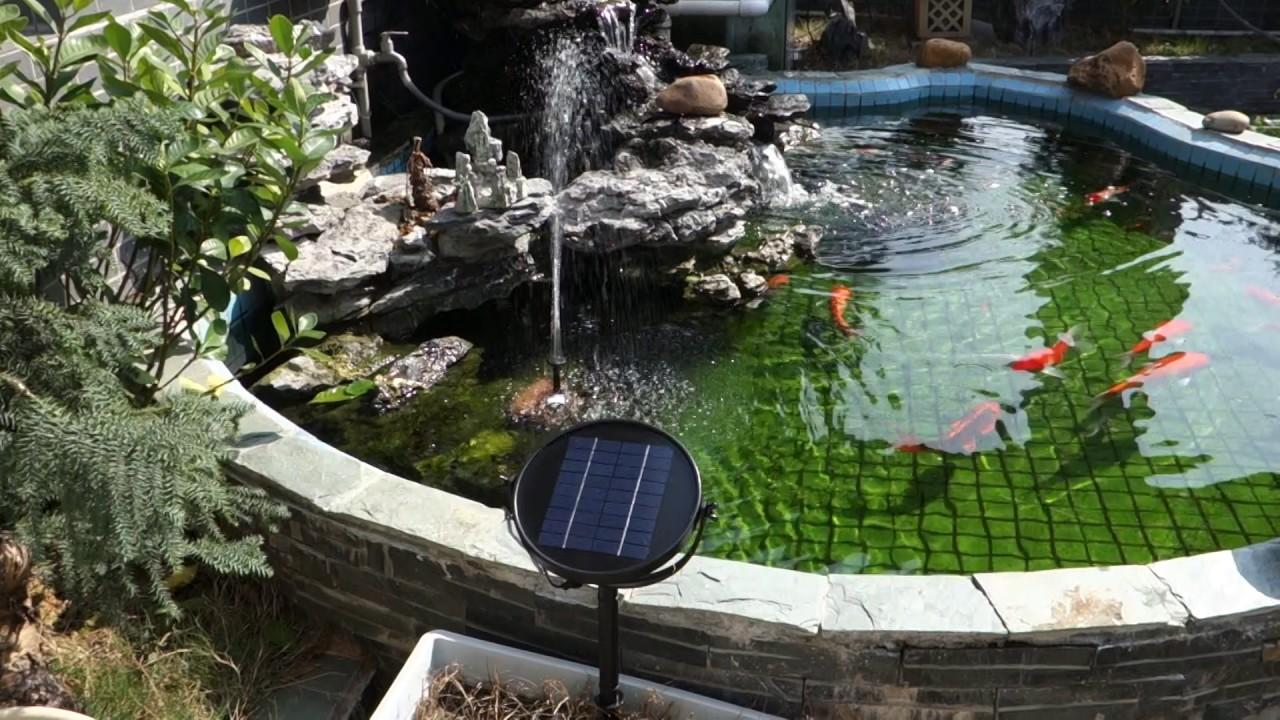
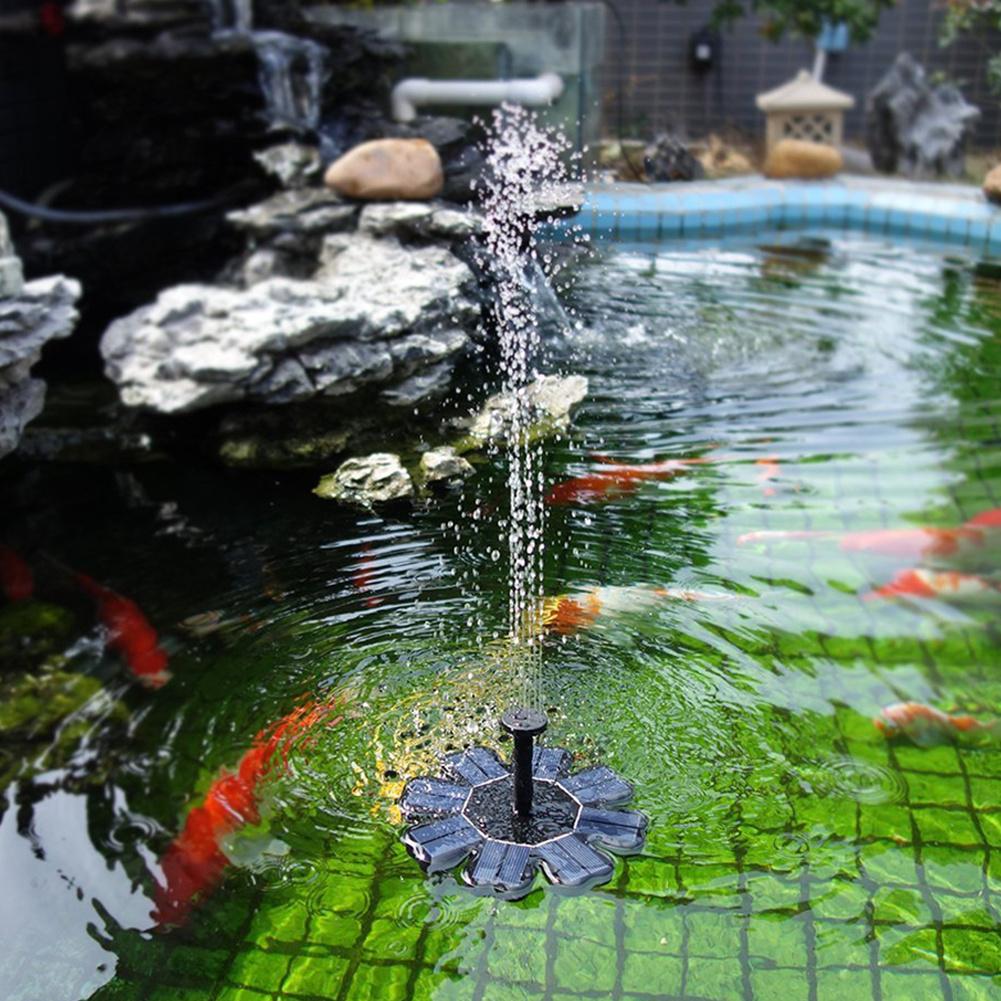
Solar-Powered Pond Fountain
A solar-powered pond fountain is a larger water feature that adds a beautiful aesthetic to any pond or pool. It uses a solar-powered pump to circulate the water and create an impressive fountain display.
Supplies Needed
To construct a solar-powered water feature for your garden, you will need the following supplies:
Container: The container is the base of your water feature and can be any size or shape you desire. It could be a flower pot, a large bowl, or a bucket.
Rock or Stone: A rock or stone will be placed on the container and serve as the water feature’s centerpiece.
Water Pump: The water pump will circulate the water from the base to the top of the fountain.
Tubing: The tubing connects the water pump to the fountainhead.
Fountainhead: The fountainhead is the decorative element that sits on top of the tubing and creates the DIY fountain effect.
Solar Panel: The solar panel will capture the sun’s energy and convert it into electricity to power the water pump.
Waterproof Sealant: The sealant will ensure the water feature remains watertight and doesn’t leak.
Choosing a Container and Rock
Choosing the correct container and rock is essential when constructing a solar-powered water feature for your garden. Regarding containers, various options are available, including pots, bowls, and other outdoor fountain decor items.
Selecting the Right Rock for the Feature
When selecting the rock for your feature, consider the style of your garden and the aesthetic you want to achieve.
Preparing the Container and Rock
Once you’ve selected the container and rocks for your feature, it’s time to prepare them for display. Here’s a brief guide to help you get started.
Preparing the Container
- Clean the container thoroughly, removing any dirt or debris that may have accumulated.
- If using a pot or container without drainage holes, create some by drilling or punching holes in the bottom for proper drainage.
- Add a layer of gravel or other drainage material to the bottom of the container to help drainage and prevent soil from washing out.
Preparing the rocks
- Clean the rocks thoroughly, removing any dirt or debris that may have accumulated.
- Arrange the rocks in the container, experimenting with different placement options until you find a configuration you like.
- Once you’ve found the perfect arrangement, use a hot glue gun or construction adhesive to secure the rocks.
Placement and alignment tips
- Consider the surrounding landscape when deciding where to place your feature, ensuring it fits the overall aesthetic.
- Make sure the feature is aligned correctly, with any flat surfaces of the rocks facing in the desired direction.
- Avoid placing the feature in direct sunlight, which can cause the container to dry out quickly and damage the plants.
Installing the Pump and Solar Panel,
learn the steps or procedure for installing a pump and solar panel. So read on to find out.
- With the pump facing away from you, unplug the cord from the outlet.
- Remove the rubber cap on top of the pump and unscrew it clockwise until it comes off.
- Locate a hole or slit in your desired location for your solar panel to be installed. This is where you will install your solar panel, so ensure you have enough room for this installation!
- Using a drill, drill a hole into the desired location for your solar panel to be installed (make sure it’s level!). This step is optional, but I highly recommend doing it, as it makes installation easier on yourself!
- Unscrew all of your hardware from your solar panel, such as screws and nuts that hold it together with metal straps and wires attached to each side, so you can separate them from each other easily when installing it into your water feature!
Building the Water Feature
To build a water feature, follow these step-by-step instructions:
Choose a pump: Select a pump strong enough to circulate water through your feature.
Set up the sump and reservoir: Install a sump and reservoir to hold the water. Connect the pump to the sump.
Attach hoses and tubing: Attach hoses and tubing to the pump, connecting them to water features (e.g., waterfall, fountain).
Place the water feature: Set your water feature in the desired location.
Fill with water: Fill the reservoir with water, ensuring the pump is submerged.
Test for leaks: Turn on the pump and check for leaks. Ensure that water is flowing correctly through the feature.
Tips for Proper Water Flow and Minimizing Leaks
- Always inspect the connections for proper fittings and secure sealing to prevent leaks.
- Keep the water feature clean and free from debris blocking the flow, such as leaves or twigs.
- Ensure the water is at the proper level; an empty pump can cause it to burn out.
- Check the flow rate on your pump and adjust accordingly with the size of your water feature and the length of the hose.
- Backflow preventers can be installed to prevent water from flowing in reverse and causing potential spillages.
By following these guidelines and checking for proper water flow and minimal leakages, your water feature will work seamlessly.
FAQs for Construct a Solar-Powered Water Feature for Your Garden: A Step-by-Step Guide
How long does a solar-powered water feature take to charge?
The charging time for a solar-powered water feature depends on the solar panel’s size and the sun’s intensity. On average, it can take 6-8 hours of direct sunlight to charge the battery fully.
Can a solar-powered water feature work on cloudy days?
A solar-powered water feature can still work during cloudy days but may not function at maximum capacity. Therefore, placing the solar panel in an area that receives as much sunlight as possible is recommended to ensure optimal performance.
Final Words
A solar-powered water feature is an excellent addition to any outdoor space. Not only does it add a beautiful and relaxing element to your garden or patio, but it is also eco-friendly and cost-effective. You can enjoy the relaxing sound of running water without raising energy costs by harnessing the sun’s power.
This brief guide will assist you in learning how to construct a Solar-Powered water feature for your garden. Don’t hesitate to try this easy DIY solar water project and enjoy the benefits of a solar-powered water feature in your backyard.